Rendering isometric sprites
In this tutorial I will explain how to render a simple isometric sprite.
All files used in this tutorial can be downloaded here. This includes:
-
The model file
-
The render settings I used
-
The strip
-
The game file (GM7 GMK)
First, create the model you want to render. I used this model:
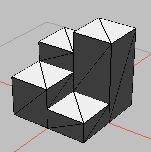
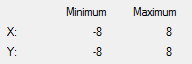
Make sure the model is the right size. In my example, I used a grid size of 32x16. The size of the model should be the same as the vertical grid size.
Open the preview, and click the render button. Use these settings:
-
size of the sprite: make sure the sprite is large enough
-
origin of the sprite: don't use the center, use a higher value for y
-
number of frames: 4
-
frames per row: 4
-
background color: use a color that is not used in the sprite
-
scale: use sqrt(2) (you can put this expression directly in the input field, the program will evaluate it)
-
camera: longitude 45, latitude -30, longitude incr 90
-
light: the direction is not really important, but you should use longitude incr 90
-
samples: 1 (using antialiasing for isometric looks strange)
-
save separate alpha mask: off
-
set edge pixels: off
Render the sprite, and import it into the game. To do this, you have to create a sprite, open the sprite editor, and use 'create from strip'. Don't forget to change the origin. In your game, the result should look like this:

Good luck!
Comments
There are no comments yet.